Wednesday, November 2, 2022

Cadence Sensor

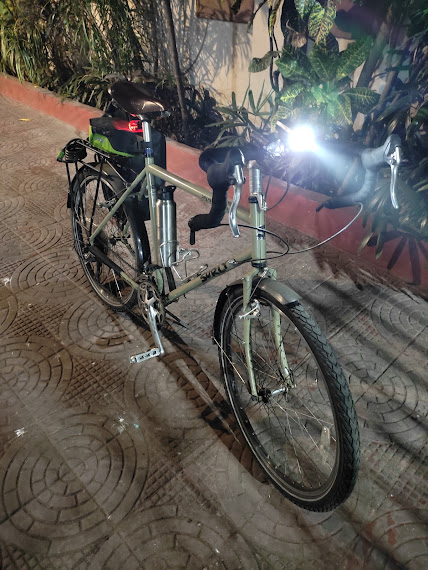
My Garmin Edge 130 is paired to a cadence and a speed sensor. While the cadence sensor is mounted on the

crank arm of the Merida, the speed sensor is installed on the training wheel. This morning I wanted to check my cadence and realised the sensor was not working. I was a little worried that it might have either conked off or the battery was down.

After coming home I promptly replaced the battery (I have a whole box full of these 2032 batteries) and to my great relief it was found to be working just fine. As is my wont, I had to once again learn the entire process almost from scratch. First you take the damn sensor off the crank arm. It is secured with a robust rubber band. Next you find out how the battery chamber is opened. That was pretty intuitive. But what stopped me for a long time is the question - how do you take the actual battery out of the slot? Turned out one has to press any of the sides of the battery down, the other side comes up. Otherwise there is no notch where you can slip your nail and jack it up. This is the ultimate in precision engineering. Not a micro millimetre is wasted.

The biggest challenge was taking the new Duracell battery out of its packing. I had to cut it open using a pair of sharp scissors !!!! 

But the great relief was when I saw the two tiny light dots signalling it was fine. I checked it out by turning on the Edge 130 and they connected almost instantly.

I wrote down the entire process here lest I forget again. I am not sure how the health of the speed sensor's battery is. I suppose it should also be changed. But then taking off the hub of the wheel is such a tricky thing to do.

I have decided to do cadence based fartleks at least once a week. That is you go for 30 seconds on high cadence and then cool off for another 30 seconds. Gradually you increase this 30 seconds to perhaps a minute. This exercise really helps. I learnt it while training on Zwift before the Darjeeling ride of 2019. 

Meanwhile, today is 3rd November and the cadence sensor is working fine. Here is today's reading.


Thursday, September 8, 2022

Changing Brake Pads on Roadie

Day before yesterday I changed the brake pads (I am not sure if they are to be called brake pads or shoes but I changed the entire housing and rubber) of my Red Roadie. I changed only the rear ones in the first go and will change the front ones tonight. The Roadie's odo says 4262 Km (after the 10 Km trial run last night). It had the original factory fitted brake pads from Merida which had worn off, to put it very mildly. In fact after my August 21 accident I had entirely taken off the rear pads  and installed the bike on my Elite (on a trainer you are not supposed to use the brakes) for rehab at home, complete with the training wheel. The training wheel being slightly wider than the Merida regular wheel, it made sense to the brake pads off.

Now I have decided to do a 58 Km ride on my birthday this year. That would be better with the roadie. So it is imperative that I instal the new pads. I had bought these Kool Stop in February 2021 off Happy Earth. You can read the post about it here . The two pairs for the front and rear had cost me Rs 3000. They are super premium by Indian standards. The oridnary ones cost Rs 250 or so. Incidentally, now I find they cost Rs 2000 each pair. Of course the exchange rate of dollar has also gone up.

Before I get into the nitty gritties of how I changed, I must say the test ride last night was super smooth in terms of rear braking performance. I never realised what I was missing with those hideous Merida OE brakes. I will need to tighten the brake levers just a bit. Right now I am reading up on the subject of how to do that.

There is nothing hi-fi about changing a brake pad. In fact I had changed them in my Surly before my Darjeeling trip (from Tektro to Kool Stop). The main challenge is to know what type of brake you have and then buy the correct ones accordingly. After that it's a matter of just using the allen keys properly. Remember to fit them in the correct direction. An arrow is shown on the rubber.

But my case was slightly complicated. I had to increase the gap between the brake caliper and the rim marginally. Otherwise the pads wouldn't fit. After much brain racking I decided to slacken the brake cable a bit. Possibly it got slackened a wee bit too much.

These brake shoes have two washers and a spacer. I kept the spacer and one of the washers on the other side of the caliper. On this side I have just one washer. It's working fine. 

Before signing off, I must once again state that the new brake shoes or pads are simply excellent. Kool Stop really makes your bike stop very cool.


Sunday, August 7, 2022

Tubus Duo Low Rider Front Rack


Today I accomplished what sometime ago seemed like a very daunting task, if not an impossible one. I installed the Tubus Duo low rider front rack on my Surly LHT's front rack. I had bought it a few years ago. On my first attempt it seemed completely impossible that the rack would fit my bike. For the life of me I could not see how it could be done. There are three holes where the bolts have to be tightened to secure the rack against the frame. And it seemed impossible that the three bolts could be properly aligned. 

But then the Tubus Duo is fairly well known in the touring circuit and so is the Surly LHT. Therefore surely it could be installed but I wasn't sure how. I even got a special skewer brought in from Happy Earth that does not have a key so that it wouldn't foul with the rack. I thought I would use it when necessary. In fact they are still kept safely in the cycling cupboard.

I couldn't find any youtube video on Tubus Duo. The Tubus Tara seemed more famous as a front rack.

Finally on a facebook forum for LHTs I saw someone's rig with a pair of Tubus Duos. His rig gave me the confidence that it could be done. In fact with this confidence I even bought a pair of Ortlieb front panniers from Stay Tuned. 

I thought I would try installing the racks with the mudguards removed. And after mentally postponing the installation several times in the past few months today I thought I'd try my luck.

So I first undid the front mudguard's two screws on the two sides. Next I started fiddling with the rack. Not much luck. I was beginning to get worried. Next I opened the instruction manual. The diagram clearly shows placing a spacer with the bottom bolt. I did that and bingo the damn thing went in without fouling with the skewer key. Next were the two bolts on the top horizontal tubes. They also went in without much drama. And I was finally done. Later, I removed the spacer and placed the mudguard's anchor point which acted as a spacer and it worked too.

I even removed the front wheel with the rack on. There was no problem whatsoever. Of course you cannot turn or rotate the key with the rack on but then you can unscrew the skewer from the other end holding the keyed side steady, which is what I did and the wheel comes off nice and easy. 

So here are the instructions for myself or anyone else who might have similar problems as me. For myself because I might soon quite forget what I did. Therefore it is prudent to write things down.


Monday, July 25, 2022

Shimano Gloves

Yesterday I got for myself a pair of Shimano gloves in size XL and colour red. The sub brand is Airway Glove. From Stay Tuned for Rs 1470. It is a thin pair without any gel. My Rockbros gloves have done 4K plus kilometers and may not last me for too long. That's why I got these. The gloves feel rather ordinary. 

There is nothing except the brand logo that can justify the price. Let me see how long they last. That can be the only justification for the more than double the price of a pair of Rockbros. 

The gloves do not have any closure around the wrist. Just a triangular piece of elastic. In fact the stitch had come off a bit on one of them. Got Monisha to stitch it.  

The one good thing about the gloves is that it is very very light. It hardly has any weight of its own. That's the in thing in the world of road biking. Some road bikers even shave their hair to reduce weight. They are known as weight winnies.

I normally require a pair of gloves to ride my bicycles (or even motorcycles) for two reasons. A. my palms sweat a lot and it becomes very uncomfortable, if not risky, to ride with such sweaty and clammy palms. B. it's safer to be wearing gloves while riding in case there is a fall. It protects the palms from bruises and cuts. Our natural tendency in a fall is to protect the body by smothering the fall with our outstretched hands. A pair of gloves can protect the palms in such a case. 

These half finger gloves are for my regular riding. For cold climes (if and when it happens) I will need a pair of full finger gloves. But that I will buy when I go somewhere really cold. Otherwise it will be a waste of money. Let me see what this winter and the next summer holds for me.


Monday, January 3, 2022

Cat Eye AMPP 400


Got this Cat Eye AMPP 400 from Bike Zone (or whatever the name is of the Salt Lake store) just before New Year when we went to Dibhai's house in Salt Lake. It's an excellent piece of Japanese workmanship. Quite bright at its highest and a little lower mode is also available to run it for longer hours. There are two blinker modes. But I realised it's a distraction to the rider. I tried riding with the full blast on. The button turned red after an hour and a half. I shall see when it goes completely dark. And then I shall use the less powerful mode.

They have given a very small USB cable to charge it with. The full charging time will need to be observed too. Right now I am down with Covid. Once I am up and running shall do all these tests. But now that I have two lights I am a lot more confident. Won't run out of light in a hurry.

I have nothing new to say about Cat Eye. They make excellent cycling products that are all made in Japan. This is my fourth Cat Eye product. I have had two Velo's (8 and 9) and one back light. All perform as expected. No drama. This light feels robust too despite being very handy and light. I think it is metallic. Not plastic.


In comparison to my 350 lumen Night Rider this 400 is a lot more bright. Possibly the reflector is of better quality. Looks slick and smart too. 

The unit attaches to the strap that one can install first on the handlebar and then clip the unit on to it. For charging or for taking it away in your pocket from a parked place it is possible to just slide it out of the strap. There is a small clip that you push and slide back. 

The NR comes with a rubber band kind of strap, which is also fine. 

Endura GV 500


It's been a long time ambition for me to go cycling in the Himalayas after retirement and I am well aware that I will need warm garments to do that. So when my favourite nephew asked me what to bring from England I told him to get for myself an Endura GV 500 insulated jacket. It's a bit pricey at 150 pounds but I never expected that he would refuse to take money for it. Incidentally, in case you are worried about the impact of this on his bank balance, his second car is a Porsche Taycan Turbo (yet to be delivered though). The first is of course a BMW.

Keeping the price part and who paid for it aside, this is easily the finest and the most comfortable piece of garment I have ever worn. It's soft, warm and very nicely packable in its own pocket into a small size. The fill is not down, which is one of the reasons I bought it. There is a new synthetic material called Primaloft which is a very premium replacement material for down that is increasingly being used in the adventure and active wear market. 

I have a down jacket for hiking in the high altitudes. It's a Marmot. Very warm and tested at -30 degree celsius in Chadar in winter. 

The disadvantage of down, apart from the whole ethical question, is it is much larger when packed and becomes a mess if it gets wet and in the mountains it always rains. Primaloft continues to work even if it is wet. Or so they claim.

I tried the jacket out one evening here in Calcutta in what was possibly 20 degree. I started sweating in less than 10 km. The only issue is that once I packed it in its own pocket and kept it in the side bag, crease marks came up on the fabric. I have kept it hanging in a hanger at home. Waiting for my next trip to the mountains. 

It has subtle but hopefully effective reflectors on the shoulder and two zippered side pockets. The chains are superbly smooth. They are not YKK but some other brand. A unique feature of the chain is you can unzip it from both upper and lower end keeping only the middle (or any other part) fixed. It is somewhat like a buttoned shirt where you open the top two and bottom two buttons open. This will be nice when you are feeling hot due to cycling but may need to pull it up soon.

I think it will make for a great jacket for around town too except that it has a cycle jacket's cut where the back side is longer than the front.

Endura is a Scottish company that makes top quality clothings and other accessories for cyclists. It has made quite a name for itself in this niche area. I hope this one lives up to the expectations. It is meant for gravel riding, which is what most Indian roads are in any case. I do not really know how a jacket is supposed to behave differently on gravel or on road. This is taking segmentation to its ultimate level. 

In any case, I hope the fabric is tough enough, being meant especially for gravel. It feels very soft and is extremely comfortable to the touch. Unfortunately it is an overkill for Calcutta. One sweats after riding with it for 10 km in the most biting winter evenings of Calcutta :-) So, I cannot really ride in it every evening during the short winter spell of our city.

However, in terms of keeping one warm in really sub zero temperature, it is not a match if compared to the Marmot that I have. One will have to layer adequately for using this in the high mountains. And I have to keep the Marmot handy too because even if the Endura is adequate while cycling, in really cold weather (Khardungla or Sela for example) one will need something warmer than this once the riding stops.