|
| As on 12th November, 2018 |
The LHT arrived yesterday (5th November 2018). Mampu was home to receive it from Fedex. It was the auspicious day of Dhanteras. So in the fitness of things I got this latest toy on that day. Let's hope it brings wealth and prosperity to the family. I will truthfully write down my first impressions.
The Surly bike came in a Merida cardboard box !!!! That was quite an anti-climax. Obviously Happy Earth has imported the cycles in bulk, in knocked down condition and didn't buy the branded boxes. That was a minor dampener. If I was Happy Earth I would probably get a few of my own branded boxes for this sort of situations.
 |
| As on 6th November, 2018 evening |
Once I opened the box, the unprofessional and casual packaging of the bike was very evident all over. I have bought a factory packed Merida and know what a properly packed bike is. That professional touch in packing was missing. The brake levers were covered in plastic bubble wrap. I would have covered the bar end shifters also. The left hand bar end shifter possibly has a small scratch from the journey. The various tubes and chainstays etc were covered in card board sheets.
The colour of the bike didn't look like silver to me at all. I guess this is what they call is the "grandpa's thermos". That's the colour of the bike that is displayed on the official website right now. I had originally wanted the Khaki, which they said they don't have. I love this colour that they have sent me. I was okay with the idea of a silver LHT but this is certainly better.
 |
| QR Skewer without end cap |
The front wheel's skewer was lying on the floor of the box. The springs were also lying like two orphan babies. The end cap was missing. Ultimately I took the front skewer from my Merida and set up the bike.
More surprise was waiting for me on the handle. The handle did not have any bar tape. I was really surprised by this. I am fine if you don't put a tape over the handle. But then you inform me about it.
I wrote to them about these two issues - missing end cap of the front skewer and no bar tape. They said while the bar tape is not put on the handle to let people adjust the brake angle and alignment, it should be in the box. I said it is not. They said they would send the skewer end cap and the bar tape. They were pretty apologetic about it.
I am not terribly upset with the shop about these issues. I can understand that the mechanic who did the job of assembling the bike and packing it must be very novice.
I noticed another thing. The decal on the non-drive side chain stay is smudged. I didn't really care about it. I would remove it in any case. It's an ugly graffiti kind of thing - "fff - fatties fit fine". I thought it was a joke saying the cycle is strong enough for fat people. Apparently it means the rim can take really fat tyres.
 |
| Smudged Decal |
I think Surly has too many decals all over the cycle. On seat stays, chain stays, top tube, down tube, seat tube, forks. I could do with one less, I gues. In fact the smudged decal looks nice and adds a character to the bike.
Happy Earth has sent me two very cheap, small, plastic complimentary pedals. While I have ordered my own (MKS Sylvan), since they have not arrived I used the complimentary ones to learn how to install a pair of pedals. I used the Taparia adjustable wrench to install it. The problem is, the wrench's tooth is a little too fat for the purpose. Installing a pedal is a useful skill to learn if you want to transport the bike by air.
 |
| View of the brake |
The fit.
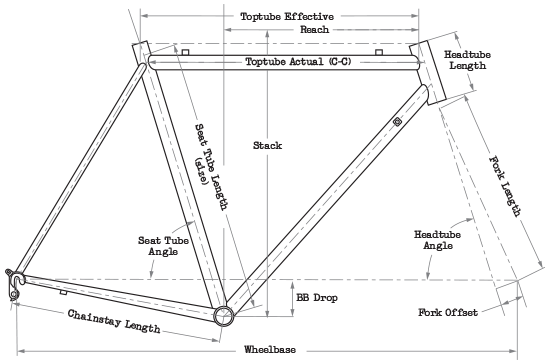
I was a little worried about the bike being too short for me. But I think it is just fine and I chose the right size of 52. Of course I have to ride it for sometime to pass a judgement but it didn't seem there would be any issue with the size. The standover height is just about adequate. The reach seemed fine too.
I am a little overawed by the brakes. They are cantilever smooth action type. The rear brake pads are a little too close to the rim. I don't know how to adjust it.
I asked Someswar to come and check the bike. He said he would come after the bar tape comes. I have already ordered for a black SRAM bar tape from BOTS. Whichever comes first goes up first. Someswar gave me some advice on how to adjust the brake pads. I shall try them today (right now I am at work). Advice number one is to adjust the barrel adjuster. Next is to tighten the adjustment nuts of the pads.
November 7, 2018
It was a holiday at work today. It's the day after our Kali Pujo. Since it was very cloudy and then it started to drizzle as well, didn't go out with the bike in the morning. I took out all the bolts that are attached to various parts of the frame to accommodate water bottles, racks etc (I think they are called bosses but I could be wrong) and applied grease to them and put them back on. If I am not mistaken there were some 14 of them. This is touted as a major plus for the bike and most reviewers comment on it. A few of them were really tight and I had to apply a lot of pressure to unscrew them at first. I am glad I applied the grease. Read about the need to do it first thing after getting a new bike somewhere last night.
I also took out the seat post and applied some grease to it. That was last night, I suppose.
Last night I had also installed the black plastic Elite bottle cage. But I think the cage is too tight for my water bottles. I might need different bottle cages.
November 8, 2018
Today the balance items came from Happy Earth. A generic bar tape in black. There is no branding on the plastic packet. It has two chrome end caps. The SRAM (which I bought off BOTS) has finishing tape that this does not have. SRAM also has two strips that are meant for sticking behind the brake lever. This tape does not have all that.

They sent me an end cap for the front QR and two rubber dust caps for Presta valves. There is another small metallic ring that has come. I wonder what it is. Just checked. It is actually the nut that is used at the base of a Presta valve. Some people think it is useless. I think it has a good reason to be there. It holds the valve against the rim and does not let it sink in when you are fixing the tube on the rim. Anyway, it is something extra that I did not ask for. Thanks anyway.
I also got the MKS Sylvan touring pedals today, bought from Happy Earth and installed them. Very robust, made in Japan pedals. I don't see them breaking down in a million miles.
Today, while taking off the plastic small pedal before installing the MKS I ripped off the thin plastic cover from the crank arm. I find there are many scratch marks on the crank arm. Once again poor practice at the shipping end, with no care taken to ensure no such injuries happen.
 |
| Front QR |
Trying to install the QR I realised the key on the non-drive side of the bike cannot be turned like I do with my Merida. What I am used to is this - facing the bike, I hold the end cap steady with my left hand against the skewer and with the right hand I turn the end with the folding key. Once reasonably tight, I fold the key up.
I realised that this cannot be done with this skewer. It is fouling against the fork, rather the end of the fork where the wheel goes in and there is a notch (are they called dropouts? not sure). So after some scratching of head I decided to hold the key side steady and turned the end cap tight. Once tight, I folded the key up. That's a solution out of the immediate problem. I wonder if that is how it should be.
Someswar will come tomorrow. Must check it out with him.
November 9, 2018
Today Someswar came and fitted the black SRAM bar tape. Doesn't look very neat or professional. Nothing like the way my Merida came, which is my benchmark of a professional job. I saw it being done for the first time in life today. I think I will do a better job of it when I try my hand at it. We decided to put the SRAM on and keep the complimentary one that came from Happy Earth for later. The black end-tape that came with the packet is of pathetic quality. I guess I will have to procure some good quality black tape and tape the end portion up.
Someswar adjusted the brakes for me - both front and rear. I wonder how much I learnt.
He also checked the front QR and said this was fine. My worries about that are gone. He really loved the bike and said no one in Calcutta has such a bike :-) I knew this last bit. I checked the bike and how it fits inside the lift at home. It fitted fine, albeit a bit heavy.
 |
| The cockpit as on 9th Nov, 2018 |
In the evening I took off the Catseye Velo 7 from the Hero MTB and put it on my LHT. I chose the stem to mount the unit. It is stuck in a left to right orientation. I wanted to leave the handlebar free for other stuff like the light and other future things. I had to go to Kalpana and get a double sided sticker tape. I had a few spare black zip ties from Velo. I used four of them.
I am waiting to go for a short spin right now (waiting for the phone to charge fully and it's taking forever). I want to check the setting of the Velo. As far as I remember it was set to 26" because that's the wheel size in my Hero MTB (converted by Someswar). But I want to check it with my Strava nevertheless and be absolutely sure. There is 197 km on it. I guess after today's spin I shall reset the odo to zero.
I am glad that the bike got set up just before the weekend. I am really looking forward to a longish ride tomorrow. Have to get for myself a spare tube. I shall try Bentinck Street tomorrow. Paying Rs 200 for courier is a bit too much.
10 PM

Went for a short spin around the neighbourhood. A little more than 3 km. Initial impression is the bike is slow. This is a natural reaction after the Scultura. But the sitting position is comfortable. It will be more comfortable, now that I raised the seat slightly after I came back home. The brakes are fine. Balance is great. Most people say that the LHT behaves better with some load. I am ridiculously light. Perhaps will deflate the tyre pressure a bit, because I thought the shock absorption left a bit more to be desired. I think I should be able to easily crunch miles with this machine.
Incidentally, I checked the Velo 7 for tyre size etc. It is indeed set to 26". I reset the odo to zero. The MTB had clocked 197 km with it. Added 3 more tonight to make it 200. I had to relearn how to set the time. Glad that I had kept the manual. It's very easily done.
10th November, 2018
Went for a morning ride within the city. All of 28 km or so. Since I don't have the spare tube I am a little reluctant to go out of town. Also I need to get into the groove of riding again.
The bike felt a little sluggish last night due to the wrong gear I was riding on. Once I changed to the biggest chain ring (I was on the middle) I was cruising fine.
My Impressions About The Bar-end Shifters
If you are riding on the hood, like I do most of the time, they are a pain. You have to take your hand off the handle and change the gear. I did miss my STI shifting. It's very convenient. Also I have to get adjusted to how much pressure to put for a change. If you press too hard you might change 2/3 gears all at a time.
The seat is definitely uncomfortable. Of course, I should have stretched my glutes before the ride. I found them to be rather stiff later when I tried to stretch.
A Few Important Spares

This evening, being a holiday, I went to the Giant Starkenn store on Bentinck Street (wonder for how long it will survive) to purchase a spare tube and a master link for the chain. I got a Schwalbe tube in size 26". It is compatible with a range of tyre widths upto 2.4. I doubt I will ever add that fat a tyre. But the option is there. The tube is with Presta valve that is 40 mm long.
It's quite heavy compared to my spare tube for the 700 c Merida road bike. Of course that tube is very narrow. Almost as wide as a finger only. But the weight of this tube is almost immediately apparent as soon as you pick up the packet. I don't know if tubes have any shelf life and expiry date. I hope I never need it on the road.
I also got for myself a master link for the chain. It's a KMC one for ten speed chains (my group set is Deore XT). This is needed if and when you break the chain on the way and need to fix it. Not an immediate possibility but since I was in the cycling market thought might as well get it

These two spares are very critical. If you ever need any of them nothing else can work even as a stop gap improvisation. There might be some solution to the chain problem but You will have to walk back home or hail a cab. Having fixed a tube on the road (I once replaced the punctured tube with a new one and then repaired the tube after coming back home), I know how important it is to have your own spares when you are out riding - alone or in a group. Now I can go riding far with my LHT.
Today I also started discussing the possible sale of my Merida Scultura 200 with the nephew of Sumanta Rana. I also took the saddle bag off the bike as well as the Park Tool portable pump. These two used to be attached to the Red Roadie. I had taken out the NR headlight yesterday. From the saddle bag I took out the spare 700 c tube and the 9 speed chain master link and put in the 26" tube and the 10 speed chain link. The tyre levers (that packet also contains the USB cable for the NR headlight and a Presta to Schrader adapter) and multitool would be common. I used to put the pressure gauge with all this on my Red Roadie. But here the 26" tube being really big, I could not accommodate it in the bag. I will carry it in my waist pouch with mobile phone and wallet. It's an electronic item and requires a little molly coddling in any case.
The attached items on the bike are as follows - A Night Rider headlight on the handle bar, a Catseye Velo 7 on the stem, a Crivit white light on the front left fork, an Elite bottle cage on the down tube, Park Tool hand pump on the seat tube, Cycliste saddle bag on the seat post with a Night Rider tail lamp attached to it, another Crivit red light on the left seat stay. These are my attachments. Meaning I added them to the bike.
A few words about the Crivit lights. My friend Raja Biswas brought them for me from England. They run on two small CR2032 batteries 3v lithium ion batteries. For their tiny size and weight they produce an incredible amount of light. They are not my principal source of light but since they are there might as well attach them to the bike :-)
Sunday November 18, 2018
This was a productive week so far as cycling was concerned. Yesterday I had gone for a 30K+ trip within the city (Red Road-Dalhousie etc). Today I went up to the airport via VIP and came back through New Town. It was a 53K ride as per my Garmin GPS. The Catseye Velo says it was a 58K ride. Didn't push myself too much. Gingerly pace. There was a problem with the second chain ring with an unknown sound coming from the chain. This corrected itself after some time. God knows what was happening. The sound was coming only when certain gears were being engaged.
Near Beleghata crossing the rear tail light somehow fell off the saddle bag. It broke into two pieces and the batteries also came off. I attached them and it's back to normal and working perfectly. Initially when I saw the broken parts on the road I thought of not picking the garbage up.
At New Town, while coming back saw these pillars of the Metro Rail which have been painted with the Nandalal linocuts that we all grew up with in Sahaj Path. Took a photograph of the bike with my most favourite pic.
Today I was feeling very hungry. Took the banana in New Town. Near Chingrihata had a small breakfast with an egg omlette and a quarter pound loaf of bread and a tea. This gave me some energy and the rest of the ride was relatively faster.
I think I must pull up the seat by at least an inch. Will do it later this week. The seat is pretty uncomfortable. A Brooks saddle is a possibility some time in future.
Sunday 24th March, 2019
I have not been writing on this particular post for some time. In this time I have added a few ornaments to the LHT. There is a pair of mudguards, a B-twin rear carrier and three B-twin bottle cages. Can't remember if I wrote here about the saddle upgrade which is a Shimano Griffon now. The other day I upgraded the brake pads and went for Kool Stops for both front and rear. I am currently waiting for the two tyres to come from BOTS. These are Schwalbe Marathon Plus Tour.
Today something funny happened that is worth writing down about. A few weeks ago I installed the LHT on my Elite home trainer. To do this you need to take out the regular Shimano skewer and instal the purpose built Elite skewer. When I took the stock skewer, I realised that the spring from the drive side didn't come out with the skewer. It was stuck.
I tried pulling it a few times. It wouldn't budge. A couple of spirals are outside but the rest of the spring is inside. This is not a big deal. I made do with the spring inside but the problem kept on bugging me at the back of my mind.
After several failed attempts over the next few weeks I even posted about the problem online looking for some tips. None came. Today I finally decided to give it one last try. I placed the bike upside down and took the skewer completely out and tried to take the wheel out. First I realised I had still not loosened the brake. Later I realised I had also not engaged the gear at the highest. Anyway, just when I jerked the wheel a bit trying to bring it out of the drop outs, the spring fell off.
I don't know how it happened or even where exactly it was stuck but the problem was solved. The only issue now is the spring is just a bit deshaped. I guess I will see if it can be replaced. If a new one cannot be purchased I shall use the one on my Merida skewer. That bike is right now on the trainer. So its skewer is lying idle.
Sunday 14th June, 2020
I haven't written on this journal for a long time it seems. Basically after the last post I had gone to Darjeeling with the bike and made quite a success of it. Given my age and state of fitness I did not expect it to be this smooth. Read about it
here . But after this, a strange sort of inaction followed. I hardly cycled after the Darjeeling trip. There was a plan to cycle in Orissa but the partner I chose was wrong. I should have known that he would never go anywhere. I could have gone ahead alone but I got so disgusted that I thought I would do it another day.
Meanwhile, from March 2020 Covid-19 happened and the resultant lockdown. Once the lockdown was partially lifted I started commuting to work on my cycle. The cycle, which was lying practically unused for more than a year in our living room, responded like an obedient child. Nothing went wrong. I pumped up and he just rolled. Of course office is less than 3.5 km but even that is a long distance if the cycle doesn't want to roll or creaks. I guess after the monsoon is over I will get it professionally serviced. Meanwhile gentle washing and lubrication of the drivetrain is enough, I guess.