Showing posts with label pannier rack. Show all posts

Sunday, August 7, 2022

Tubus Duo Low Rider Front Rack


Today I accomplished what sometime ago seemed like a very daunting task, if not an impossible one. I installed the Tubus Duo low rider front rack on my Surly LHT's front rack. I had bought it a few years ago. On my first attempt it seemed completely impossible that the rack would fit my bike. For the life of me I could not see how it could be done. There are three holes where the bolts have to be tightened to secure the rack against the frame. And it seemed impossible that the three bolts could be properly aligned. 

But then the Tubus Duo is fairly well known in the touring circuit and so is the Surly LHT. Therefore surely it could be installed but I wasn't sure how. I even got a special skewer brought in from Happy Earth that does not have a key so that it wouldn't foul with the rack. I thought I would use it when necessary. In fact they are still kept safely in the cycling cupboard.

I couldn't find any youtube video on Tubus Duo. The Tubus Tara seemed more famous as a front rack.

Finally on a facebook forum for LHTs I saw someone's rig with a pair of Tubus Duos. His rig gave me the confidence that it could be done. In fact with this confidence I even bought a pair of Ortlieb front panniers from Stay Tuned. 

I thought I would try installing the racks with the mudguards removed. And after mentally postponing the installation several times in the past few months today I thought I'd try my luck.

So I first undid the front mudguard's two screws on the two sides. Next I started fiddling with the rack. Not much luck. I was beginning to get worried. Next I opened the instruction manual. The diagram clearly shows placing a spacer with the bottom bolt. I did that and bingo the damn thing went in without fouling with the skewer key. Next were the two bolts on the top horizontal tubes. They also went in without much drama. And I was finally done. Later, I removed the spacer and placed the mudguard's anchor point which acted as a spacer and it worked too.

I even removed the front wheel with the rack on. There was no problem whatsoever. Of course you cannot turn or rotate the key with the rack on but then you can unscrew the skewer from the other end holding the keyed side steady, which is what I did and the wheel comes off nice and easy. 

So here are the instructions for myself or anyone else who might have similar problems as me. For myself because I might soon quite forget what I did. Therefore it is prudent to write things down.


Wednesday, February 17, 2021

Tubus Front Rack

Yesterday, while surfing through the Happy Earth store I suddenly came across a Tubus front rack. Not that I had a specific requirement for it right now but it was indeed in the wish list. After seeking Monisha's approval I placed the order. Apparently, they had just one in the warehouse. At Rs 11K it is not cheap. In fact if I had it brought in by someone it would work out much cheaper for me. But then you cannot really request someone to bring in a bicycle rack for you. It is quite bulky I am sure and no one will like carrying it. I do not know when it will come from Happy Earth. Perhaps next week. 

Tubus has quite a few different types of front racks. This is the Duo Low Rider. These are essentially two S shaped tubes that you fix on either side of the front wheel. There is nothing connecting one to the other like the Tubus Tara. There is another like the Surly one that has an elaborate ladder kind of platform in the middle (above the mudguard). I did not want that. It would be quite heavy and bulky. Happy Earth has the Surly model too. But I have the Tubus rear rack and the moment I saw the front one I went for it. 

(If you are not an Indian and chanced onto my blog - getting quality, high end products for cycles is not easy in India. Even if you get some reputed brands - getting a choice of different brands and varieties is almost impossible. So one has to be on the lookout all the time. You cannot buy them just when you need them. In my cycling cupboard I have two chains and two sets of brake pads. I am also on the lookout for Garorskin or Schwalbe tyres.) 

The online review for this particular rack is almost non-existent. All the reviews are for Tubus Tara. There are a few discussions of people who have had problems fitting it to their bike. But it was reassuring to find a few reviewers saying they are happy with it on their LHT. Some say that with the rack on the skewer becomes a problem and taking off the front wheel is an issue. I will have to see. I have the additional problem of the mudguard also :-)

I think there is a case for making a video on how to install it. I shall do the unboxing live on GoPro when it arrives and show the pros and cons of installation. Let me see how it goes. 

Wednesday, 24th February 2021

Fedex delivered the big box at the office yesterday. I am yet to open the box at home. I will do the entire unboxing in front of camera. Therefore I will do it when I have the time. Possibly around the weekend.

Thursday, May 30, 2019

Tubus Logo Classic


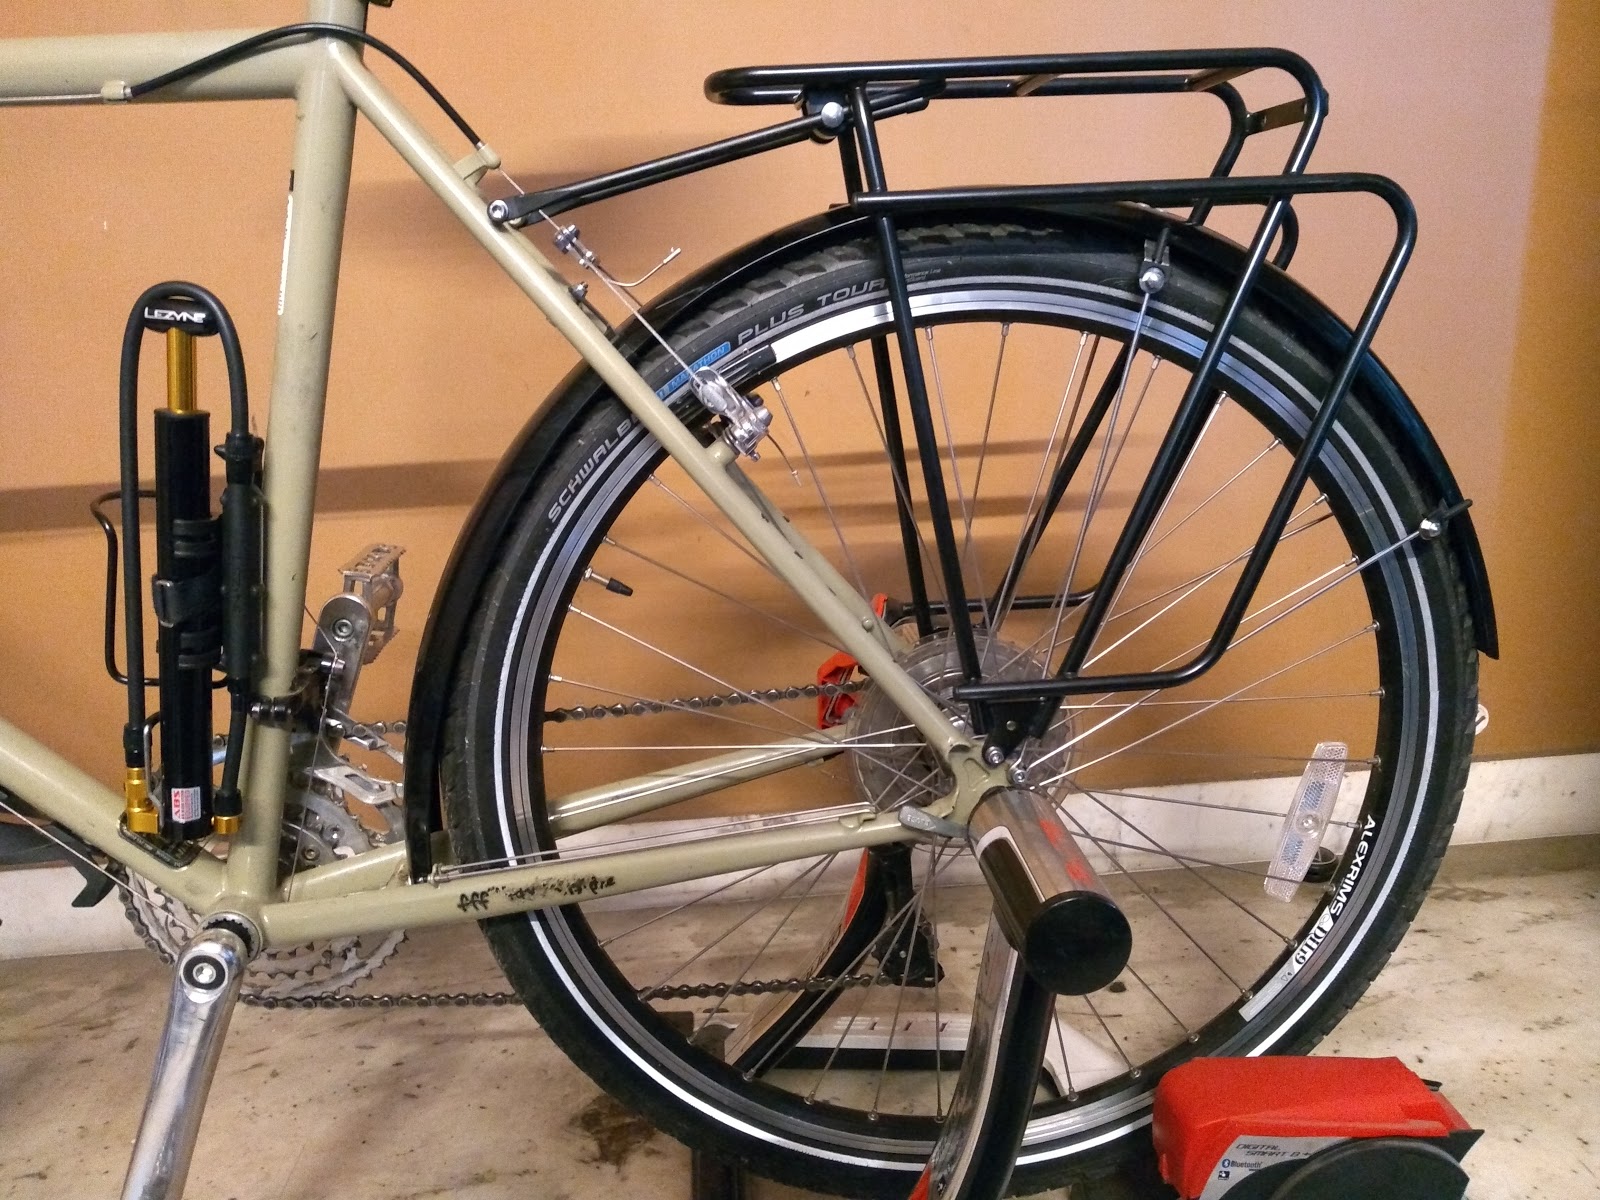
 Last night I brought home the Tubus Logo Classic from Ritabrata. I had to spend a mini fortune on it. Rs 13,000 plus. Abroad it costs $100. But I cannot ask a friend to bring a pannier rack for me. That's asking for too much. So got it from Happy Earth through Ritabrata's Stay Tuned. By far, this is my most expensive piece of cycling accessory.  

The rack looks very simple. It indeed is very simple. I wonder why we cannot make such stuff here in India. Perhaps the demand is too low. But the beauty of this rack is that although it weighs like a feather, it can be loaded up to 40 kg. Question is am I ever going to load my bike with 40 kg luggage? It's not about that. It's about the strength of the rack. A touring bike, or indeed any bike for that matter, can take a tumble and fall down. Its chance of surviving a big tumble without any fracture is that much more than a Rs 750 Btwin rack (that I also have). 

The beauty of precision German engineering is written all over the rack. It's silk smooth to the touch and the lines are very clean. The welded joints could be cleaner but that's fine. It might look very unimpressive for its price. But the appeal of the accessory is in its strength vis-a-vis weight. 

I am yet to install it. The instruction manual and the hardware to attach it is in the small tubular thing that came attached to the rack. The manual seemed straight forward and useful. It might not be a piece of junk that most of these manuals generally are. It seemed to have follow-able instructions. I will report on its ease of installation after I actually do it. I plan on creating a video out of it. There is nothing on youtube.

June 7th, 2019

This evening I installed the rack on the bike. It wasn't such a major problem except tightening of a pair of nuts which are in a very difficult to reach position. I hope the nuts are properly tightened. Essentially eight bolts in all. Not too complicated. The trick is not to tighten them all from the beginning Keep them loose. Once the whole thing is more or less installed, tighten them up thoroughly one by one. I used a spirit level to ensure that it is perfectly level. I did it by putting it up on the home trainer. The bike now looks like a proper touring bike.

There are two nuts that are a little tricky to tighten if done after installation because there is very little leeway for the spanner to move. But you cannot preinstall them either. So after the installation I took off the two front bolts and loosened the two bottom bolts. This helped me to push the rack back a bit giving me adequate space to tighten the nut. Once done I put the bolts back on. Now I wonder whether I should have put a drop of Loctite on those nuts.

The installed rack - final view

Medium Term View

I started using the rack to hang a pannier and go to work every day. I hanged it, only one and not two on either side, from the lower tube for a few days but now I use the top tube. The rack's powder coated colour discoloured at the contact points of both the tubes. So the powder coating is fairly thin. I hope the primer underneath is stronger. I have half a mind to wrap an electrical tape there. Otherwise the rack is very solid. I lost one of the two rubber end caps that were attached to the end of the arms that attach the rack to the seat stays. Must have fallen off. I am sure I can get a replacement but it will be something local. Not the German original :-)