Monday, June 8, 2020

Plans For A Cycling Computer

I have been meaning to get a cycling computer for quite some time. I was making do with Strava for the longer rides and the Forerunner 15 for the short ones. But both have some inadequacies. The Forerunner 15 for example, essentially a running watch, is not meant for long hours on the saddle. Its battery is not meant for that kind of application over an extended period of time. It can barely last 3/4 hours with the satellites and heart rate monitor connected (which is how I use it). A typical day of cycling on a tour would last at least six to eight hours. Therefore the Forerunner cannot be taken on a tour. It cannot  even be taken on a day long cycling ride of about 50 or 100 kms. 
Forerunner for short commute

So I used Strava to record our Darjeeling trip in 2019. 

While Strava is fine for analysing data after it has been captured, it also has serious limitations as a data capture method during a trip. First of all you are never too sure whether it will capture or is capturing the data correctly. The other day on the way back home from work, it did not capture the data at all. Then you need to remember to switch it off or "finish" the trip after you reach your destination. When I reached Ghum from Kurseong, I forgot to finish my ride and it captured all my movement in and around the station (it's an interesting maze with me going from the station to the cycle shop in front to the momo shop to the hotel and then back to the station etc) till I remembered to switch off. Also, if I am not mistaken when you are finishing the ride you need to have access to the internet.

And then Strava is as weather proof as your phone, meaning it is not weather proof at all. Therefore putting it on the handlebar for a day long ride, exposing the phone to the hot sun or rain, is a little risky. Even if you do, visibility of the data on the go will be well nigh impossible. Plus I do not like switching my phone location on. The whole world it seems wants to know my location. I am reluctant to divulge that data to the various apps on my phone. I just feel it is modern snooping in the name of making the user experience better.

Therefore I wanted to have a cycle computer (how our requirements grow compmlicated with time and available technology - as a child all I wanted was a cycle). My requirements and expectations from the computer are very basic. I do not need too many fancy data about my ride. I want a computer that will have a long battery life. It will give me basic information about the ride like time spent, speed, distance traveled - in short what my Cateye Velo 9 gives me. I do not need any navigation support. I prefer finding my own way around. This requirement might change in future but as of now I do not like the complications involved in getting navigation guidance from a machine. In fact the Velo 9 is good enough for me except that it cannot show me a map of my trip after the trip is over. I feel fascinated like a child when I see the map of my journey. I do not know why but it happens. I love looking at the details of where I had gone. This is the principal requirement for me, not so much the speed. I don't really care about my speed at all.

Now Garmin's Edge series has a very celebrated 530 model that is quite a rage with those who can afford it. Simply put I cannot afford it. And in any case I do not need to know so many different things about my ride or the ability to download routes and then follow them turn by turn. So investing so much money on a 520 or 530 was out of question. I am not using the cycle computer for monitoring my training for an Olympic gold.

So I kept looking at the various models and then I discovered these two relatively new models. The Edge 130 and Edge 25. While the later, cheaper model would have sufficed me just fine, it seemed to have serious battery limitations. I find from reviews that the Edge 130 has great battery performance. The official claim is of 15 hours but with all the sensors attached it might be about half. Since on a tour I will not add any sensor I could easily expect 10 hours on a single charge. So I made up my mind to go for it. The 25 is more suited for shorter city based rides of four to six hours. The Edge 130 has certain capabilities that will not be useful for me - for example, I do not need to know my VO2 Max - but that's fine. 

As of this evening (June 8, Monday, 2020) I spoke to Jasraj. He is sending the model to his Calcutta office. It will be mine for Rs 13800. Substantially lower than the listed price of Rs 190000.

Unanswered Questions 

As of now I have a few unanswered questions that I can find out only after actually using the unit. First, I need it to also function as an odometer where it keeps track of the total kilometre traveled. As far as I could see from available online information it probably has one but I need to see if it gets reset under any circumstances. The Forerunner, for example, does not have one.

I also need to understand how to store my trip details. Normally after a ride you come back home and download the data into your computer through Connect. On a trip that is not possible unless you are carrying a laptop. So if I am on a trip for X number of days can the unit store that much data? Online research shows it can store 100 hours of data. My Forerunner can store seven runs and then if I record an eighth run it will automatically delete the oldest one. If I was riding for ten hours a day, therefore, it can handle a ten day trip. 

I found it mentioned somewhere that you can, through your smart phone, store the data in Garmin Connect app from anywhere. If that is the case then I can go for unlimited number of days on a trip and store all the trip information on Connect. Apparently it can also upload the data on social media like facebook or Strava. Since my Connect is already synced to Strava just connecting to Connect is enough for me. 

I shall be most curious to explore these features. Most reviews don't talk about these features. They only talk about all the training things that the unit can do like calculating VO2 Max etc. Who cares? 

Possible Upgrades/Accessories 

Even before laying my hands on the main unit I am considering upgrades :-) I think I would love to have a proper Garmin mount for the unit and speed and cadence sensors. But strangely enough I cannot find them with any online store here in India. REI in the US has the sensors for $70. The mount is available on the US Garmin store. Not that these are critically important to have but they are nice to have kind of accessories.

The unit comes with a mounting system that is rather basic. You can attach it to your handle bar or the top tube. But the after market mount looks rather cool and stays a little away from the bar. It is meant to be more secure in case the cycle falls. 

The cadence sensor is useful to have while on the trainer and using Zwift. Riding at a fixed cadence of 90 or so is ideal and to train while monitoring cadence is a good thing. I could not possibly have gone to Darjeeling without training on Zwift. And that training gets more teeth if you have a dedicated cadence sensor. The speed sensor, I am not sure about but if I go for additional sensors might as well get the full bundle. Theh speed sensor measures speed through calculating rotation of the wheel through magnetic field around the wheel. I am not sure how or why they choose such a complicated method.  

I think I will have to wait for international air travel to go back to normal and then for Mezda to travel to the US to get them. For some strange reasons these do not seem to be available here in India. 

Arrival, Unboxing and Charging

Today is Saturday 13th June, 2020. I just brought home the Garmin Edge 130 from Nikita's office. 


Monday, October 7, 2019

Greenfield Kickstand

The installed kickstand
The right sized bolt. 6mm M10

I went for a Greenfield Kickstand some time back for my LHT. I went for it so that I don't have to worry too much during a tea or momo break for the most stable support to keep the bike standing. With some load it might be more difficult. So went for this American kickstand. 


It is lightweight being made of aluminium. Since it is made in the USA I am hoping they have made something quite sturdy. The kickstand cannot be installed without a pair of Surly clamps, which I had to buy also and in fact that costs more than the stand itself. The main challenge for the installation was finding the right sized bolt. The supplied bolt that the kickstand came with was found to be too small for the job. So I went looking for a larger bolt. My first port of call was a shop in Prinsep Street. They specialise in nuts and bolts only. After two sorties I found the right sized bolt and installed the stand, which is a very simple no brainer kind of a job. I was apprehensive that our metric thread pitch might not match with the American thread that the kickstand comes with. The bolt is supposed to go inside the stand. But the fear was unfounded. The bolt was metric despite being American. 

The bottom of the stand
After installation, the stand was found to be too long. The cycle was standing almost erect and not stable at all. I found they had markings on the back side of the stand where you are supposed to chop off according to your requirement. I got Kushuda to cut off about 2 cm from the bottom of the stand. He has the hacksaw required to do the job. Plus I find the sound of cutting metal with a hacksaw very irritating. He didn't take too long to cut off the stand. The bottom of the stand has a peculiar shape. Half of it is a triangle while the other half is like a semi-circle. Kushu-da cut more or less parallel to the bottom so the shape was somewhat maintained. He used my angle grinder to file off the edges. 

The cycle stands perfectly at ease, even on the shiny floor of our living room. I have to get a rubber foot for it, which is again available only with Happy Earth :-(. Asked Sankhadeep in Bangalore to see if he can manage it somehow. Costs just Rs 75. Not a critical requirement but nice to have. Possibly I will need to cut off a bit more when I instal the rubber foot.

Standing its ground firmly. With Mezda at a tea shop on Camac Street

Long term view - I am glad that I decided to instal the kick stand. It's useful to have. I am yet to get the rubber foot for it though. The other day while I had a lot of load in the side pannier - like 5/6 kg as I put the office laptop in it - it seemed a little unstable. I thought the bike might topple. I have to check how it behaves when there is equal load on both sides of the bike. It is possible that the instability was due to the load being only on one side of the bike.

Yesterday as I took it off the bike for a thorough cleaning I realised that the plates had put marks on the frame. The top paint has come off, exposing a black colour underneath. It is not raw steel that is exposed. I guess it is the ED primer. I have asked Surly to tell me whether I should worry. They have not replied yet.

Thursday, May 30, 2019

Tubus Logo Classic


 Last night I brought home the Tubus Logo Classic from Ritabrata. I had to spend a mini fortune on it. Rs 13,000 plus. Abroad it costs $100. But I cannot ask a friend to bring a pannier rack for me. That's asking for too much. So got it from Happy Earth through Ritabrata's Stay Tuned. By far, this is my most expensive piece of cycling accessory.  

The rack looks very simple. It indeed is very simple. I wonder why we cannot make such stuff here in India. Perhaps the demand is too low. But the beauty of this rack is that although it weighs like a feather, it can be loaded up to 40 kg. Question is am I ever going to load my bike with 40 kg luggage? It's not about that. It's about the strength of the rack. A touring bike, or indeed any bike for that matter, can take a tumble and fall down. Its chance of surviving a big tumble without any fracture is that much more than a Rs 750 Btwin rack (that I also have). 

The beauty of precision German engineering is written all over the rack. It's silk smooth to the touch and the lines are very clean. The welded joints could be cleaner but that's fine. It might look very unimpressive for its price. But the appeal of the accessory is in its strength vis-a-vis weight. 

I am yet to install it. The instruction manual and the hardware to attach it is in the small tubular thing that came attached to the rack. The manual seemed straight forward and useful. It might not be a piece of junk that most of these manuals generally are. It seemed to have follow-able instructions. I will report on its ease of installation after I actually do it. I plan on creating a video out of it. There is nothing on youtube.

June 7th, 2019

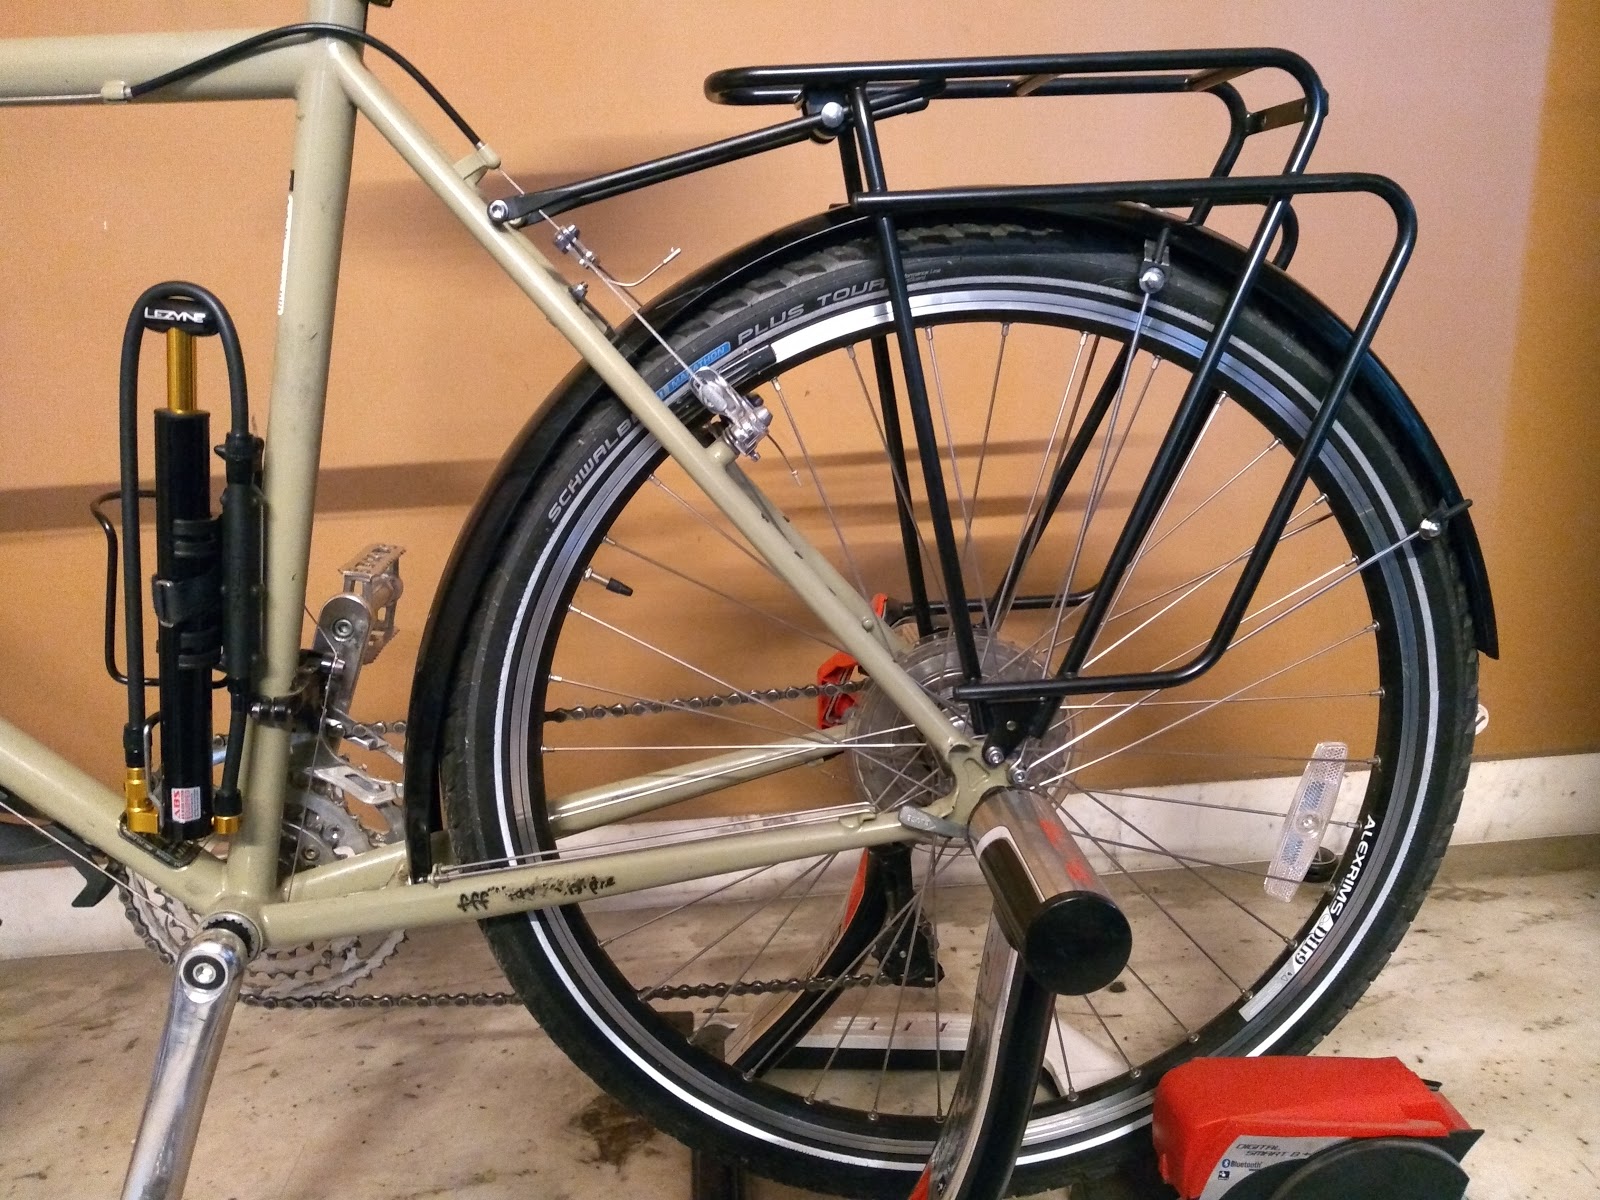
This evening I installed the rack on the bike. It wasn't such a major problem except tightening of a pair of nuts which are in a very difficult to reach position. I hope the nuts are properly tightened. Essentially eight bolts in all. Not too complicated. The trick is not to tighten them all from the beginning Keep them loose. Once the whole thing is more or less installed, tighten them up thoroughly one by one. I used a spirit level to ensure that it is perfectly level. I did it by putting it up on the home trainer. The bike now looks like a proper touring bike.

There are two nuts that are a little tricky to tighten if done after installation because there is very little leeway for the spanner to move. But you cannot preinstall them either. So after the installation I took off the two front bolts and loosened the two bottom bolts. This helped me to push the rack back a bit giving me adequate space to tighten the nut. Once done I put the bolts back on. Now I wonder whether I should have put a drop of Loctite on those nuts.

The installed rack - final view

Medium Term View

I started using the rack to hang a pannier and go to work every day. I hanged it, only one and not two on either side, from the lower tube for a few days but now I use the top tube. The rack's powder coated colour discoloured at the contact points of both the tubes. So the powder coating is fairly thin. I hope the primer underneath is stronger. I have half a mind to wrap an electrical tape there. Otherwise the rack is very solid. I lost one of the two rubber end caps that were attached to the end of the arms that attach the rack to the seat stays. Must have fallen off. I am sure I can get a replacement but it will be something local. Not the German original :-)

Tuesday, May 28, 2019

Ortlieb Panniers


The much awaited Ortlieb Backroller Classic panniers arrived yesterday. Bought from Starkenn online stores, they cost me Rs 10,200 for the pair. Together they have 40 litres of space. I got it in colour black. I had wanted them in yellow but they didn't have that colour in stock. The other option was red but I declined that. 

My first reaction was - these are heavy. These are big. I have still not done anything but just had a basic look at one of them. I went by their reputation for being very good, durable and waterproof. I can test these only over a period of time. 

As of now these are the most expensive ornaments I bought for my bike. This will be surpassed by something else that I am getting tonight. A Tubus Logo Classic rack from Happy Earth, through Ritabrata of Stay Tuned :-)

I will possibly need another front handlebar bag. Ortlieb has a 15-litre one at Rs 7.5k. Let me see. 

July 20, 2020

Since starting daily commute to office on my LHT, I have started using the pannier. I keep my lunch boxes and other office stuff in it. I have a small tool bag with my tube replacement kit, the Lezyne pump and a spare tube. I have kept the other bag stuffed with woollens so that it does not gather those creases. 

I am yet to test the water proofness of the panniers. There have been only minor drizzles during my office commute so far. I got seriously drenched only once for a few minutes. The bag held up pretty well. Not a drop inside. So there is no reason to doubt its water repelling power, given also that every single user swears by them. I find it a little heavy and wonder if they aren't going to be too much to carry in a mountain trip. 

The system to take it off the rack is very nice and convenient. Given that I have serious OCD I frequently used to check if the pannier was still there. Nowadays I use the strap to keep it strapped to the rack as an extra bit of peace of mind. 

Thursday, May 9, 2019

An Ambition - Manali to Leh

It will be a dream ride and it is still in the dream stage. I want to ride from Manali to Leh and further on to Khardungla. Perhaps next year in August. I have more than a year to prepare the body and the mind. And also to do all the planning.

Right now I have a few unanswered questions in my mind. God knows who will be able to answer them. There is a guy in Manali called Navin who runs the Firefox dealership there. He is apparently very dependable and knowledgable.

Most of the blogs I read are by people who did supported rides (that is, they had support vehicles with tents, cooks etc; in short they got taken for a ride by any of the numerous touring agencies). We will do it unsupported. I spoke to Rana. He is game, though he thinks getting 3 weeks out of his practice might be difficult. Understandable. For self-appointed professionals going on a vacation means no work, no pay. That makes their trip all the more expensive.

Let me jot down the questions.


  1. Do we need to carry sleeping bag?
  2. Do we need to carry mattress?
  3. Do we need to carry a tent? 

I have all the three but the question is whether these are necessary to be carried. If yes, then my pannier rack will have to be upgraded and a solid plan devised to carry everything.

Then there are more questions.
  1. Do we need a butane burner? 
  2. Is butane gas available in Manali? (10th May - called up this company in Delhi called Hans. They said they have no stock in Manali right now. That might or might not mean it will not be available when we go)
If not, then we will have to either go by train or pick it up in Delhi. But Manali being an important base for mountaineering, I am sure these items would be available there. 


If the above is yes, then I will also have to carry the utensils and the ration. So pannier bags will have to be purchased.

Is it easy to find a bicycle cardboard box in Leh? Because I shall be discarding my box in Manali and need a new box in Leh to pack the bike. Is it easily available? I saw couple of well stocked bike stores in Leh. Will check with them.

Used this pic to get the number :-)
10th May - I called up one of the stores in Leh. They said yes it's very much and easily available with them. That's great to know.

We will find those details out later. For now, let me concentrate on the route.

Day 1 Manali To Marhi - 37 km - 

Manali (0 km) - Palchan (10 km) - Kothi (13 km) - Marhi (37 km) 
This looks like the pretty obvious first day for virtually every one. Mostly uphill through green roads. Might rain. Lots of dhabas.

Day 2 - Marhi (0 km) - Rohtang (17 km) - Gramphu (23 km) - Koksar (37 km) - Sisu (50 km)

Rohtang to Sisu is mostly downhill

Day 3 - Sissu - Thandi - Keylong - Jispa


Wednesday, May 1, 2019

A Pump And a Saddle

After the Darjeeling trip (read about it here), two of the things I knew I will have to invest in were a Brooks saddle and a Lezyne Microfloor pump. The pump was in fact more necessary because my existing hand pump, I knew, was totally inadequate for the job on a 26"x1.75 tyre. 

In fact one of the first things I did after coming back home was put up my Park Tool Half Pint for sale on Cyclop (a popular facebook group for Indian cyclists). It got sold in moments because I had kept a sensible price of Rs 500 plus courier. 

Next I did some research and realised Lezyne had two models of micro-floor pumps for touring. They come with a pipe and didn't need back breaking pumping to inflate 10 psi. One was high pressure, with or without in-line gauge (HPG or HP); the other was for high volume without gauge (HV). Soon I discovered that the HPG was available in India with Starkenn and in fact at a price that is lower than what one has to pay in England. I immediately ordered for it. That was on Tuesday. 

Brooks was available with Bike Affairs, Hyderabad. But I thought I would buy it later. 

After placing the order with Starkenn started the long and arduous wait for the item to arrive. I was told there is some stock audit going on in their warehouse so it's taking time. 

On Tuesday (that is yesterday and a good one week after the order was placed on Starkenn) I got a message from Guria (my niece living in America) saying she is coming in a week or so and if I needed anything. I realised God is there and He really wants me to ride. Or at least spend on cycling equipment. 

By evening, when I still did not hear from Starkenn, I called them up and cancelled the purchase. I had not paid and opted for COD. 

Next I sent two links to Guria asking her to bring the pump and the Brooks saddle. One from Amazon and the other from REI respectively. As far as I know they are priced $85 and $119. So a total of $204. I asked her to get me the high volume pump without the gauge. 

I wasn't sure if space would be an issue for Guria in her suitcase and told her to go only for the pump, if it was. But this morning she confirmed that she is ordering for both.

May 3, 2019

I knew I would need to buy a thing called Brooks Proofide to treat the saddle. Now Proofide is either not available with any of the regular cycle retailer or available at an exorbitant price in Amazon. I realised getting it by courier will be expensive for Guria and work out to be same for me as buying in India. So more research.

Finally I realised it is available for £ 8.99 in Evans Cycles. Further research and a question to Raja showed that their Cardiff store is not very far from Raja's house and close to his daughter's school. So I told him to get it for me. Asking him to get it by courier would be torture on his pocket. Courier charge alone is £ 5 pounds.

Problem with Raja is he does not accept money for such small items. 

So, I am more or less sorted for now.

Sunday May 12, 2019

Guria arrived on Saturday 2.30 am. I went to their house today and brought the saddle and pump home. The total damage is $216 (x Rs 70). It's a little more than I anticipated because she bought the pump with digital gauge, which is the latest model and quite a bit more expensive. I have no clue why she went for this. This is not a subject she would know anything about to use her discretion. Most likely the store didn't have the required model and suggested or perhaps auto suggested this one, which is fine with me.

I promptly went on with the task of working them both out. Here are my first impressions.

Saddle 


Out of the box, my first reaction was - what a beauty ! It's smooth and flawless. Shiny in a dignified way. I read the short literature and referred to a website on how to treat the saddle the first time. They suggested that you lightly spread the supplied Proofide on both sides of the saddle. Rub it off and then ride the next day perhaps. So I did that. Applying it on the underside is not so easy because of the rails. The amount supplied in the sachet is just about right for one application.

It's looking a little matty now. I installed it on the Surly, after taking off the Griffon. Will possibly ride it tomorrow. Can't wait for the morning. The odo on my Cateye shows 922 km.

Monday May 13, 2019 - Went for a 10 km ride this morning. It wasn't so uncomfortable as people make it out to be. At least I couldn't find it any less comfortable than my Probike Griffon.Therefore I can assume that it will get better. The underside of the saddle is still wet from the Proofide I appliled last night. I guess that is how it should be.
Went for 15 more today, May 14th. Didn't expect any major change. I can feel the saddle better now. Once it starts flexing a bit it will be a great saddle. Let me see how soon that happens. I guess it takes at least 500 km. Since I am on the lighter side it might take longer for me. But I am not worried at all. I am fine with it as it is.

Pump 
Nice pump, though I didn't like its shiny colour. Each stroke increases the pressure in the tube (26"x1.5) by 1 PSI. Sometimes it takes 2. The digital gauge is very nice and useful too but it requires a battery (I don't like carrying electronics around in the rough and tumble of multiple day touring life). I pumped it up from 30 to 45 with about 20 strokes. It's not as easy as they show it on youtube, or at least I am not that strong. Quite hard for me but better than the Parktool Half Pint I had. The handle on top could be a little larger. It's too small. I have to figure out how to attach the pump to the frame. Looks like they expect me to sacrifice a bottle cage. No chance, Mr Lezyne. Or is it possible to attach both the bottle and the pump on to the same set of braze ons? Will have to find that out. It might quite be possible.
I love the screw on feature of the nozzle the most. You cannot damage the valve. Presta valves are pretty dainty. I have blown one so far.

Friday Evening, October 11, 2019

The other day there was a discussion on a cycling group on portable pumps and strongly voted for portable pumps with a hose because the tiny ones are really impractical unless you have very strong arms. The discussion prompted me to try the pump on my 700cx23 road bike. It's also a good idea to actually use mechanical things once in a while. Otherwise they get damaged.

I loved the gauge once again. I loved the smoothness of the barrel and the piston. It is definitely easier  than the earlier Park Tool thing that I had (which was really really small) but filling in the 700x23 is a lot harder, particularly after 25 psi. I used a small towel to properly grip and put pressure on the handle. Otherwise the small handle was hurting my palm. I loved once again that you can do the job while standing, as with a proper pump. I did reach 90 psi all right. But I would prefer not to use it at all ;-) With my Park Tool I could barely reach 40 after a lot of struggle.


Friday, April 5, 2019

On Presta Valves


A bicycle can have any of three valves in its tyres. Presta, Schrader or Dunlop/Woods. The Presta valve is the thinnest of the lot and used in tyres that typically have very high pressure. It is a much hated valve among average cyclists because of its dainty nature. If you are not careful you run the risk of breaking the tip of the valve. 

This is precisely what I ended up doing to my Merida rear tyre the other day while trying to take off the pump from the valve after filling it up. The tip just vanished !!! I even opened up the pump's chuck to look for it. Just couldn't find it out. 


The tip in the above picture is missing. I had broken it off while trying to pull the chuck of the pump off the valve. Regrettably I had to replace the tube with a Maxxis one that I had. I still have another brand new Schwalbe in stock. The tube that I damaged is the original tube that came OE with the bike. This tube taught me two important things in cycling repair and maintenance. A. It taught me how to replace a tube on the road. B. Later at home I repaired this tube with my own hands using a patch and rubber solution etc. Once you learn these two basic things your confidence with touring grows immensely.

The only good thing about the tip blowing is that even if you break the tip, air does not go out immediately. It oozes out of the tube the normal and usual way. In fact pushing the last bit of air out of the tube is a little difficult when you don't have a tip. You have to use a pin to insert in the hole that is created and let the air out. 

Apparently this tip can be repaired if the core of the valve is a removable one. In my cheap Taiwan made tube the core is not removable. So I have to do away with the tube altogether. I will keep it as a memento.